Thursday, June 30, 2016

New Butterfly Sprite from Aurora Wings


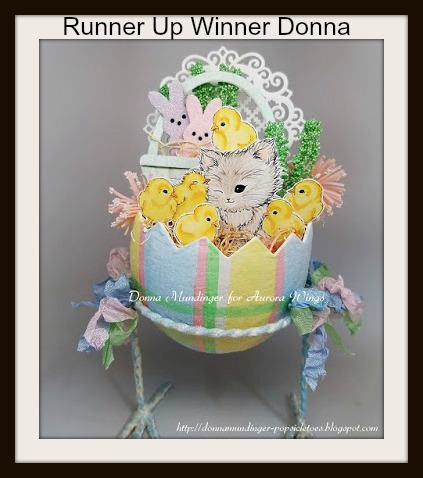
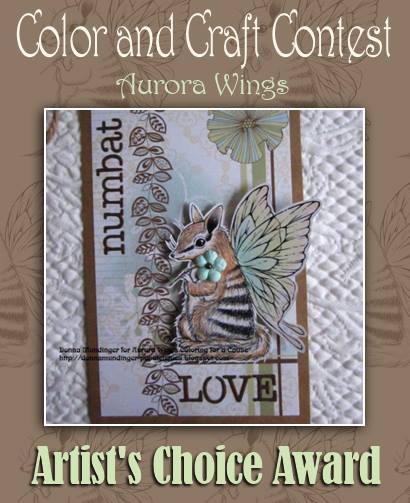
I'm thrilled to be joining the Aurora Wings Showcase Team to introduce the newest member of the Sprite Family.  Meet Butterfly Sprite.  I've gone a a bit out of my comfort zone making an altered canvas garden for her to play in.


Here's a closeup of this little cutie that I've colored with Copics and fussy cut. I've used the "simple wings" version, but she comes with "fancy wings" as well. Check out the Showcase post to see inspiration using both versions.  You will get both versions and may choose between the jpg or png files in the Aurora Wings Etsy Shop.  The png files have no background, but a white image to color, so they can be used with digital paper or merged with other digital stamps, if you like.  The gorgeous ribbon here is from DL.Art Supplies.


My original plan was to do something pretty CAS with the new butterfly die from Memory Box.  Instead, I went WAY out of my comfort zone with a mixed media extravaganza using paint and inks and frantage and stamping (with real rubber on the canvas, yea, me!) and even some stenciling with modeling paste and had a ball.  Doesn't she look happy among the flowers, dancing with her friends?


Gotta say my inspiration came from Lisa's flower tutorial HERE.  I was so enchanted by her gorgeous floral inspiration and shabby chic style as a DT member for DL.Art month after month, that I just had to try some of my own. Mine look slightly different because I didn't have the same floral die and I added centers I had in my stash and crinkled some leaves, as well.  The light pink flower was made with mottled pink paper, the darker, smaller one started out white and was sprayed with Dylusions sprays.  I had so much fun with them, I decided Butterfly Sprite would love them too, so her magical garden came into bloom.  On the left corner you can see the bit of my stenciling with modeling paste.  My paste was so thick, that most didn't stay on the canvas, but I kind of liked the shabby result.


Finally, there's the dimensional shot.  I hope you like my project as much as I loved making it.  Be sure to visit the Aurora Wings Showcase Blog to see the amazing creations from the Showcase Team and some of my Aurora teamies. You'll also want to check out the June Discount code and special "Christmas in July" giveaway that ends June 30, so hurry!

There's also a few days left for our Black and White Plus One Other Color Challenge which ends at 11:55 pm EDT on Saturday, July 2nd.  Hope to see you there.


Here's how to keep up with all that's happening at Aurora Wings.


Tuesday, June 28, 2016

Aurora 'Peek'


There's a new image at The East Wind today called Aurora 'Peek'.  Isn't she a stunner?  This was kind of a last minute quicky.  I totally fell in love with her. Papers and flowers from my stash.  Die cut sentiment from Cuttlebug.  Chose a monochromatic scheme to play at Left of Center.


Yeah, red hair again.  What can I say?  The Copics were already on the desk. LOL  Besides, I think it looks nice with the monochrome shades of turquoise, don't you?  Sorry for the short post.  Lots to do getting ready for our 4th of July party.  Do check out all the goings on at The East Wind.


Here are of all the important links you need.

Friday, June 24, 2016

Lucy Loo 'Welcome Back'


It's Friday and that means another new release at The East Wind.  Meet Lucy Loo 'Welcome Back'.  Talk about some 'TUDE, eh?  Decided to crop her and go a bit grungy with some paper I'd spritzed through a potato sack and then sprayed with water.

Here's the full stamp (shown in the pink).  Isn't she great?


I've used the NB (no background) png version of Lucy and added a digital background (long ago freebie, I think) from Make it Crafty.  Most of the East Wind images come in several forms (for one low price) so you can get creative.  She's colored with Copics, the chain link fence is done with Prismacolor pencils.  We've got lots going on at The East Wind.


Here are of all the important links you need.

Thursday, June 23, 2016

Guest Designing for DL.Art


I'm so thrilled to be joining DL.Art for their Thankful Thursday Challenge.  Both Diana, herself and DT member Katie, live in the area and I've had the pleasure to meet them in person at the Scrapbook Expo several times.  The theme for this challenge is "Summertime" (or you can substitute a thank you card), and we're showcasing the new Tropical Summer Bundle available at DL.Art Supplies.


Just take a look at those yummy colors!  They really scream SUMMER to me so I looked for complimentary DP and found this from an old DCWV Stack that seems to be missing it's cover.  The patterned stripes gave me an idea to make a spinner card and I had just the image.  Meet Cartwheel Carrie by Sandra Caldwell.  I actually suggested this image to Sandra because I couldn't for the life of me ever do a decent cartwheel.  But wait 'til you see her go!  She's colored with Copics in the colors to match the gorgeous Tropical Summer Bundle.


Okay, so I'm not the greatest at photographer, but it's hard to hold the camera and make the thing spin at the same time. Plus, it only took me ALL day to figure out where the heck it went on my computer when I uploaded it and publish it on Youtube so you could see it here, so cut me some slack.  LOL Gotta say I'm pretty thrilled that I managed it all by myself, since computer stuff is definitely NOT my forte.

Be sure to check out the gorgeous makes by the DL.Art team.  Thanks so much for letting me join you for this challenge.  Also check out the rest of the fabulous ribbon assortments at DL.Art Supplies.  You'll be glad you did.

I'm entering this in the Simon Says Wednesday Use Patterned Paper Challenge, Crafty Ribbons Summer, Crafting by Designs 3 Patterned Papers, Whoopsie Daisy June Bring on Summer, Inky Impressions June Summertime, Di's Digi Designs Summer and Creative Moments ATG/Summer.

Wednesday, June 22, 2016

Sand Globe Hippo


If you're familiar with Sandra Caldwell's adorable images, you'll already know she has a full line of hippos that are cuter than cute.  One of my current faves is the new Sand Globe Hippo, perfect for summer.  She's having a picnic, courtesy of the new Sandwich This and That set and ice cream cone from the new Ice Cream This and That set.  These little extras come in all sorts of themes and are perfect for rounding out a project.  The current contest in the Sandra Caldwell Stamp Fans FB Group calls for a combo of regular digi plus "This and That" items, so this is mine.


I've made an easel card and a real "sand globe" by recycling packaging from red line tape (bummer it now only comes in a plastic bag).  After printing the image multiple times on white, as well as yellow and turquoise to paper piece the base, I hand cut the bottom part of the globe and used Nesties Circles to cut the globe insert as well as the border that hides where I've glued the acrylic "globe".  I tore sand printed DP and glued it atop the embossed waves on the bottom to complete the beach scene.


Here's a closer look inside the globe.  I've filled it with actual sand after coloring multiple layers of Sand Globe Hippo and the cone with Copics, fussy cutting and layering the images for dimension and adding some cute sunnies to the beach babe and Glossy accents to the ice cream.


The picnic basket is attached with foam to the sand globe base and the layered sandwich is laying on "sandwich wrap" so as not to get all sandy.  The sentiment was computer generated.  Last day for the contest, so I'm sort of sneaking this in.

I'm also entering this in the DL.Art June Linky Challenge, Creative Moments ATG/Summer, Fresh Brewed Designs Life's a Beach, Critters and Creatures June Llinky Party,  Crafty Creations ATG, Crafting from the Heart ATGCraft your Passion ATG, Love to Scrap ATG613 Avenue Create ATG/Optional Tag, Lil Patch of Crafty Friends ATGCorrosive Challenge June Lots of LayersLet's Color Linky Party 10 ATGCrafting with Friends ATG, Creative Fingers ATG, Simply Papercraft ATGCrafting with an Attitude ATGCrafty Girls Creations ATG, Little Claire's Create a Scene and Inspiration Destination ATG.

Tuesday, June 21, 2016

The East Wind "Make Mine Girly Girl"


There's a new FB Challenge over at The East Wind with the theme of "Make Mine Girly, Girl".  I've chosen Funky Tutu Irresistible Mon Amour because I love the delicate feel of the image and popped her atop one of the dies from Spellbinders Opulent Ovals, which suggested a mirror frame.  Of course I used pink and ribbon, and roses and pearls, all with a "girly girl" feel, and even added a tiny hand mirror charm.


I printed Funky Tutu on sort of mottled pink cardstock and colored just her hair and lips minimally with Copics.  Then I added white pencil to her tutu to ring it out a bit.  The dreamy, sketchy image needed nothing else.

I hope you come join us on The East Wind FB page for this new contest and also check out the current Blog Challenge, You Da Man, which runs through June 25th.


Here are of all the important links you need.

Monday, June 20, 2016

New Challenge at Aurora Wings


Our new challenge starts today at Aurora Wings, hosted by the Aurora Team, with the theme of Black & White with One Other Color.  Our take is different than most of the other challenges with this theme, actually more greyscale coloring (+ one), meaning we're also omitting skin and hair colors from our palette.  (OOOH!  Scary, huh?  LOL)  I've made a wall hanging using the gorgeous Chrysanthemum Festival, with Spellbinders Grand Labels Four for the base and Tattered Lace Oriental Chrysanthemum and Die-Versions Oriental Lantern purchased specifically for this challenge.


Here's a closeup of the beautiful Chrysanthemum Festival.  She's colored with Copics using all Neutral Grays with only Y15 and Y17 as the color accents.  This is the first time I've attempted this greyscale coloring, but it won't be the last. It really was loads of fun.  Be sure to stop by the Challenge Blog to see the stunning work by my teamies.


Here's a detail of the hanging lantern.  It's so delicate, that I decided to cut it 5 times in black and glue them all together to make it sturdy enough to hang alone from the bottom.  Then I used a double layer of yellow card stock (because with one layer it still cut through) and ran it through with only the embossing mat and plate so I could still see the shape, but it was still a solid piece. I then cut around the outside of the lantern shape, just inside the indent and glued it to the back of the die cut to fill in.

I hope you visit the Challenge Blog and are inspired enough by what you see to enter this brand new challenge.  We also have a FB Contest (Use a Cropped Image) going on now until June 30th.


Here's how to keep up with all that's happening at Aurora Wings.


Sunday, June 19, 2016

New Freebie from The East Wind in celebration of Markers! Papers! Digis!


There's a new coloring Group on FB called Markers! Papers! Digis! that launched on June 15th.  A number of digital artists have joined the celebration with fabulous freebies available when you join the group.  Today, in a special edition of the TEW newsletter, you will receive this gorgeous digi for FREE.  Check your inboxes if you've already subscribed, or if you have not, sign up on the TEW Challenge Blog HERE  (through the end of June to receive yours).  I've colored her with Copics, enhanced her necklace with Liquid Pearls and added some Stickles for shine.

Tuesday, June 14, 2016

New Release for The East Wind


Sorry, I've been rather remiss in blogging these days.  My craft room is completely torn up and I'm struggling with some mojo issues, the weather has beckoned me outside and well, you know how it goes.  However, this gorgeous new image from The East Wind called Yeon Hong got me moving in the right direction.  I've used digital paper from Gecko Galz for the background and originally printed it in the totally transparent png form right on the DP and again with the NB png to color (with Copics) and fussy cut around Yeon Hong herself, minus the veil, to let the background DP show through the transparent "fabric". Clear as mud?


Anyway, the best laid plans don't always work out, as I colored the image and loved it so much, I was afraid to cut away the veil.  Besides, some of the background area was so dark, I was afraid the veil would be completely lost, so I fussy cut her with the veil and then used my Copics to fill in a slightly lighter version of the DP.  Not much in the way of embellies, as the digi paper had a lot going on, but I did think the cherry blossom branch and flower stickers lightened the mood somewhat.  I think she's really elegant, don't you?

Our FB challenge, "Crop It" is on through June 17th and we begin a new Blog challenge on June 15th.  Hope to see you all join in. 

Here are of all the important links you need.

Monday, June 6, 2016

A Touch of Class for Aurora Wings


It's time for another challenge at Aurora Wings, hosted by the Stella Team, with the new theme of "A Touch of Class".  Again, this theme is open to wide interpretation and I'm sure you'll enjoy the fabulous variety of projects by the team, but I personally think of "timeless (and perhaps a bit understated) elegance" and nothing says that more to me than pearls.  A gorgeous strand was one of my mother's most treasured gifts from my father and I remember him helping her with the clasp as a final touch to her outfit before going out. It was always that "extra something" that enhanced her ensemble and meant a special evening was in store.  I can still feel their love when I wear it today, so Woman with Gardenia and Pearls was my immediate choice for this challenge.


Here's a closeup of this gorgeous image.  She's colored entirely with Copics with no extra shading with pencils, as I was trying to keep her very soft and dreamy. I printed her smaller than I normally do because I already had the design in mind, so when it came down to the pearls, instead of using the flat backed adhesive ones, I found myself forced to use Liquid Pearls instead.  They still make me nervous, but I've found that the best way to keep them from running together when they are next to each other is to either let each one set a bit before adding the next, or do every other one and then go back and fill in.  Still not perfect, but I'm improving.  Unfortunately I did the pearls prior to die cutting and embossing the image which did flatten them somewhat.  Not really noticeable unless you look on the back but...  Grrr...!!!  Note to self!


This dimensional shot is also to show the pearlescence of the pink die cut, (Spellbinders Fancy Grand Labels One) and the ivory mat.  I've popped both the frame and image, as well as the sentiment and added a few more pearls to balance the design.


The embossing you see was done on vellum with a Stampin'Up folder.  I then cut the roses apart and arranged them on either side of the image.  I found that the vellum tape I had showed through (I tried it first on a scrap) so I used it only where the die cuts overlapped.  However, the roses didn't lay as flat as I liked, so I tried to take the teeniest bit of vellum tape and roll it to tuck under the embossed edges in a few places, which was just enough to solve that problem.  I'm hoping that my subtle details enhance, rather than detract from Mitzi's beautiful Woman with Gardenia and Pearls and bring to mind "A Touch of Class".

We can't wait to see what you come up with.  Our June FB Contest, "Use a Cropped Image" is also going on now and we hope to see you join us there, as well.


Here's how to keep up with all that's happening at Aurora Wings.